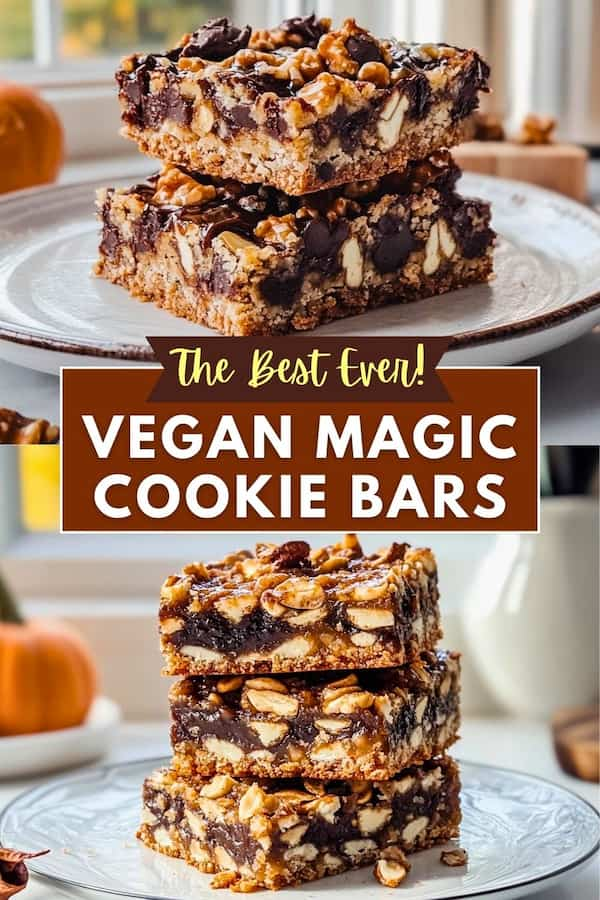
If you’re looking for a quick, decadent, and shareable dessert, look no further than vegan magic cookie bars. These bars combine layers of rich vegan condensed milk, crunchy gluten-free graham crackers, gooey chocolate chips, and chewy shredded coconut.
Perfect for parties, potlucks, or just satisfying your sweet tooth, these bars are a Pinterest favorite, especially during the holidays. Plus, they’re dairy-free, gluten-free, and incredibly versatile with options for customization.
Pin it for later!
Ingredients
For the Base:
- 1 ½ cups gluten-free graham crackers, crushed
- ½ cup coconut oil (melted)
- 1 tbsp maple syrup
For the Vegan Condensed Milk:
- 1 can full-fat coconut milk (13.5 oz)
- ½ cup coconut sugar
- 1 tbsp maple syrup
Toppings:
- 1 cup vegan chocolate chips (dark or semi-sweet)
- ½ cup shredded coconut (unsweetened)
- ½ cup chopped nuts (pecans, walnuts, or almonds)
- ¼ cup vegan butterscotch chips (optional)
How To Make Vegan Magic Cookie Bars
Step 1: Prepare the Vegan Condensed Milk
To make the bars rich and creamy, you need vegan condensed milk. This is easier than it sounds. In a small saucepan, combine coconut milk, coconut sugar, and maple syrup. Cook the mixture over medium heat, stirring regularly to dissolve the sugar.
Once the sugar has dissolved, reduce the heat to low and let the mixture simmer for 25–30 minutes, or until it thickens and reduces by half. You’ll know it’s ready when it coats the back of a spoon.
Remove the saucepan from the heat and allow the mixture to cool completely. The vegan condensed milk will thicken even more as it cools.
Step 2: Make the Gluten-Free Graham Cracker Crust
While the condensed milk cools, preheat your oven to 350°F (175°C). Line an 8×8-inch baking dish with parchment paper for easy removal later.
To make the crust, crush your gluten-free graham crackers into fine crumbs using a food processor or by placing them in a plastic bag and crushing them with a rolling pin. In a medium-sized bowl, mix the graham cracker crumbs with melted coconut oil and maple syrup until everything is well combined.
Press this mixture into the bottom of your lined baking dish, forming an even layer. Use a spatula or the back of a spoon to press it down firmly, ensuring the crust sticks together. Bake the crust for 8–10 minutes, until it becomes golden brown and slightly firm.
Step 3: Assemble the Magic Cookie Bars
Once the crust has baked, it’s time to assemble the bars.
- Pour the Vegan Condensed Milk: Pour the cooled, thickened vegan condensed milk evenly over the crust. Use a spatula to spread it out, ensuring that every corner of the crust is covered with this sweet layer.
- Add the Toppings: Sprinkle your vegan chocolate chips, shredded coconut, and chopped nuts evenly over the condensed milk layer. If you’re feeling adventurous, you can also sprinkle a few vegan butterscotch chips for extra richness. These toppings will create the gooey, crunchy magic that these bars are known for.
- Press the Toppings: Gently press the toppings into the condensed milk with your hands or a spatula. This step helps the toppings stick together as they bake.
Step 4: Bake and Cool
Bake the assembled magic cookie bars in your preheated oven for 25–30 minutes, or until the edges are golden brown and the toppings have set into the condensed milk. Keep an eye on them in the last few minutes to ensure the coconut doesn’t burn.
Once baked, remove the dish from the oven and allow it to cool completely before slicing. For the best results, you can refrigerate the bars for 1–2 hours after they’ve cooled, which will make them easier to cut into clean squares.
Step 5: Slice and Serve
Once your vegan magic cookie bars have cooled and set, use the parchment paper to lift them out of the baking dish. Place them on a cutting board and use a sharp knife to slice the bars into squares or rectangles, depending on your preference.
These chewy, crunchy, and rich bars are perfect for serving immediately or storing for later. Keep them in an airtight container at room temperature for up to 5 days, or refrigerate them for up to a week.
They also freeze well, so feel free to make them ahead of time and freeze any extras for up to a month.
Customization Ideas for Vegan Magic Cookie Bars
One of the best things about these magic cookie bars is how versatile they are. You can easily customize them to suit your tastes or dietary preferences. Here are a few ideas:
- Dried Fruit: For a chewy, sweet variation, add some dried cranberries, raisins, or chopped dates on top of the condensed milk layer.
- Different Nut Options: While pecans and walnuts are popular, you can swap them for hazelnuts, macadamia nuts, or even sunflower seeds for a nut-free option.
- Vegan White Chocolate Chips: For a sweeter twist, add vegan white chocolate chips to the mix. They pair beautifully with the shredded coconut.
- Peanut Butter Swirl: Before baking, drizzle some melted peanut butter or almond butter over the top for an extra layer of flavor.
- Spice it Up: Add a sprinkle of cinnamon, nutmeg, or pumpkin spice to the graham cracker crust or the topping for a seasonal flavor boost.
Tips for Perfect Magic Cookie Bars
- Use Full-Fat Coconut Milk: To achieve the right consistency for your vegan condensed milk, make sure to use full-fat coconut milk. Low-fat versions won’t thicken properly.
- Let Them Cool Completely: Patience is key when making magic cookie bars. Letting the bars cool completely, or even refrigerating them, makes slicing much easier and prevents the layers from falling apart.
- Press the Toppings Firmly: Gently pressing the toppings into the condensed milk ensures they stick together during baking and creates a cohesive texture.
Why These Bars Are So Magical
These vegan magic cookie bars are more than just a sweet treat. Their rich, layered flavors and textures make them truly irresistible. From the buttery graham cracker crust to the gooey vegan condensed milk and the crunchy nuts and coconut, every bite offers something new.
Not only are these bars dairy-free and gluten-free, but they’re also incredibly easy to make. Whether you’re looking for a crowd-pleasing dessert to bring to a party or a treat to share with family, these bars are sure to be a hit.