If you’ve ever wondered why restaurant burgers taste better or why a simple grilled cheese can go gourmet, the answer might be caramelized onions.
I’m not talking about quickly sautéed onions that are just soft and translucent. I mean real, deeply golden, sweet, jammy caramelized onions that have cooked low and slow until they’re practically candy.
Now, I always have a jar in my fridge. They’re my secret weapon for making ordinary dishes extraordinary.
Why I Love Making These at Home
Sure, you can buy a little tub of pre-caramelized onions at some fancy grocery stores — but they’re never as good. And honestly? It’s so easy (and cheaper) to do it yourself.
Here’s why this recipe is a staple in my kitchen:
- Unbelievable flavor with simple ingredients.
- Versatile. Use them on burgers, sandwiches, pizza, pasta, eggs — you name it.
- Meal prep friendly. Make a big batch and keep them in the fridge or freezer.
- Makes your house smell amazing. Seriously.
And let’s be honest — there’s something incredibly satisfying about watching a big pile of raw onions melt down into a golden, flavorful treasure.
Ingredients You’ll Need
This recipe is all about simplicity.
- 4–5 large yellow or sweet onions
- 2–3 tbsp olive oil or unsalted butter (or a mix)
- Pinch of salt
- Optional: pinch of sugar (helps jump-start caramelization)
- Optional: splash of balsamic vinegar or wine at the end for depth
You don’t need anything fancy. Just good onions, fat, and a little time.
Prepping Your Onions
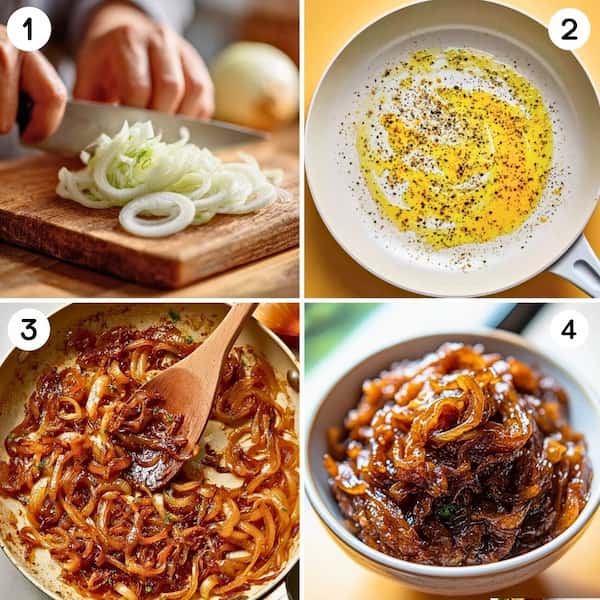
First, peel your onions and slice them thinly.
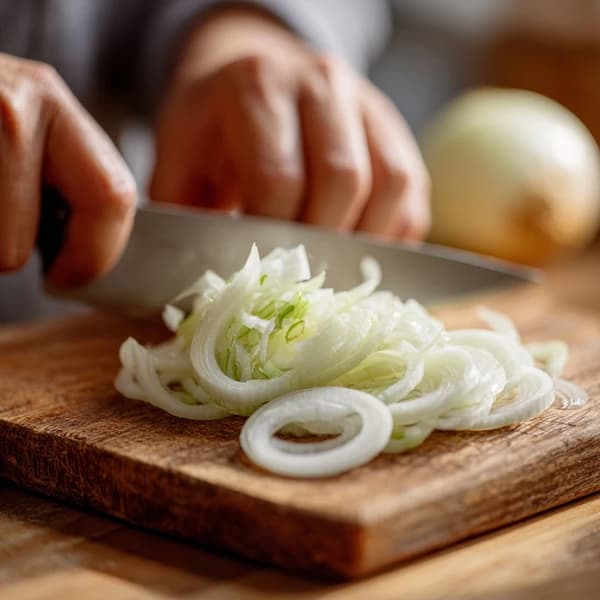
You can cut them into half-moons or quarters depending on your preference. I like about ⅛- to ¼-inch thick slices — thin enough to break down well, but thick enough to hold some texture.
Pro tip: If slicing onions makes you tear up like you’re watching a sad movie, chill them in the fridge first or slice near an open flame.
Getting Started: Heat and Fat
Choose a large, heavy-bottomed pan — a stainless steel or cast-iron skillet is perfect. Avoid nonstick if you can; you want that fond to develop on the bottom for maximum flavor.
Add olive oil, butter, or a combination of both over medium heat. Butter adds richness, while olive oil prevents burning. I often do one tablespoon of each.
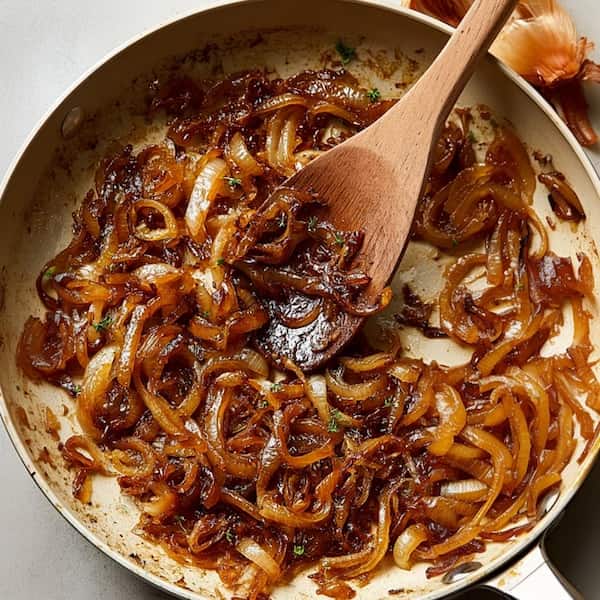
When the fat is hot and shimmering, add all your sliced onions.
Don’t worry if the pan seems crowded. The onions will cook down dramatically.
Patience Pays Off
Here’s the thing: caramelized onions can’t be rushed.
Cook over medium to medium-low heat, stirring every few minutes. At first, the onions will soften and turn translucent.
After 10–15 minutes, they’ll start to lose volume. You might see some browning on the bottom of the pan — this is good! Just scrape it up with your spoon and stir it back in.
Add a pinch of salt at this stage. Salt draws out moisture, helping them break down.
If you want, you can also add a pinch of sugar to help speed caramelization and intensify the sweetness. It’s not necessary if you’re patient, but it’s a good cheat when you’re short on time.
Deglaze if Needed
As the onions cook, they’ll leave brown bits (fond) on the bottom of the pan. Don’t let these burn.
If the pan gets too dry, splash in a tablespoon or two of water, broth, wine, or even balsamic vinegar and scrape up the browned bits.
This trick layers even more flavor into your onions.
When Are They Done?
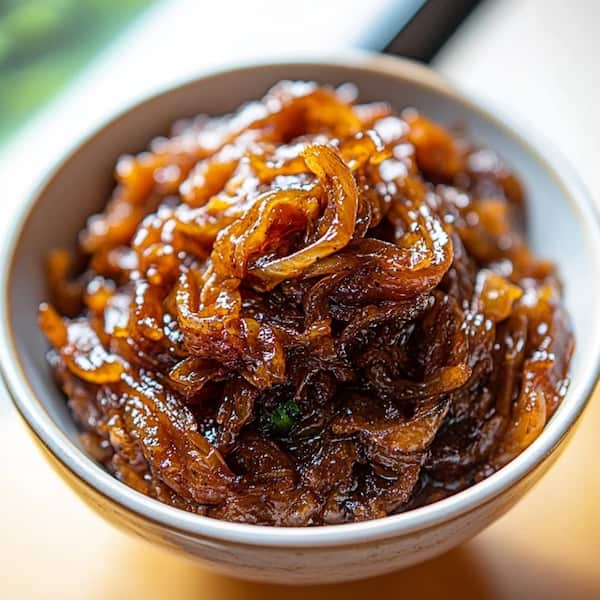
Real caramelized onions take at least 40–45 minutes. Some cooks go for an hour or more for deep, dark, almost jammy onions.
They’re done when they’re deep golden brown, sweet, soft, and taste so good you want to eat them by the spoonful.
Don’t stop too soon! If they’re just pale and limp, they’re sautéed onions — not caramelized.
Optional Finish: Balsamic Boost
For a little extra wow factor, I love adding a splash of balsamic vinegar or wine in the last few minutes.
It deglazes the pan, adds acidity, and balances the deep sweetness perfectly.
How to Use Your Caramelized Onions
This is where the fun starts. Caramelized onions are incredibly versatile.
- Pile them on burgers or grilled sandwiches.
- Stir them into pasta or risotto for a sweet-savory note.
- Spread them on pizza or flatbreads.
- Use them in French onion soup.
- Top steaks or roasted chicken.
- Fold them into omelets or scrambled eggs.
- Add them to salads or grain bowls for extra depth.
Honestly, they make pretty much everything better.
Storing and Freezing
Good news: caramelized onions store beautifully.
- Refrigerate: Keep them in an airtight container for up to a week.
- Freeze: Portion into small containers or even ice cube trays and freeze for up to 3 months.
I love having a stash in the freezer for quick weeknight meals.
Why You Should Make It Today
Caramelized onions are one of those cooking projects that reward you for slowing down. They turn humble, cheap ingredients into something luxurious and deeply flavorful.
Yes, they take time. But the process is simple, soothing, and the result is always worth it.
Once you get in the habit of making them, you’ll wonder how you ever cooked without them.
So grab a few onions, carve out a little time, and make a batch this weekend. Your future self (and your future meals) will thank you.
Ingredients
Method
- First, peel your onions and slice them thinly. I like about ⅛- to ¼-inch thick slices — thin enough to break down well, but thick enough to hold some texture.
- Choose a large, heavy-bottomed pan . Add olive oil, butter, or a combination of both over medium heat. When the fat is hot and shimmering, add all your sliced onions.
- Cook over medium to medium-low heat, stirring every few minutes. At first, the onions will soften and turn translucent. After 10–15 minutes, they’ll start to lose volume.
- Add a pinch of salt at this stage. Salt draws out moisture, helping them break down. If you want, you can also add a pinch of sugar to help speed caramelization and intensify the sweetness
- If the pan gets too dry, splash in a tablespoon or two of water, broth, wine, or even balsamic vinegar and scrape up the browned bits
- Real caramelized onions take at least 40–45 minutes. Some cooks go for an hour or more for deep, dark, almost jammy onions. They’re done when they’re deep golden brown, sweet, soft, and taste so good you want to eat them by the spoonful.