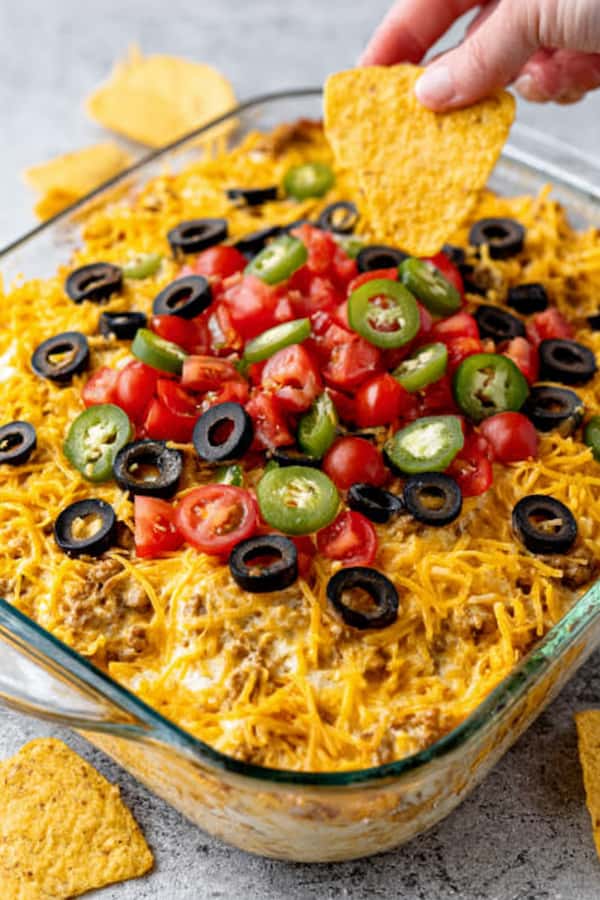
Taco dip is a layered cold dip built on a cream cheese and sour cream base, spread in a wide dish and topped with refried beans, cheese, tomatoes, olives, green pepper, and shredded lettuce.
It’s the dip that works at every gathering without fail — no cooking, no reheating, and it can be assembled the day before. Once it’s on the table with a bowl of tortilla chips, it tends to be the first thing gone.
Ingredients
Serves: 10–12 as a dip
For the base layer:
- 8 oz cream cheese, softened
- 1 cup sour cream
- 1 packet (1 oz) taco seasoning
- 1/2 teaspoon garlic powder
For the layers (in order):
- 1 can (16 oz) refried beans, warmed slightly and spread over the base
- 1.5 cups shredded cheddar or Mexican blend cheese
- 1 cup shredded iceberg lettuce
- 2 medium Roma tomatoes, seeded and diced
- 1 green bell pepper, finely diced
- 1 can (2.25 oz) sliced black olives, drained
- 3 spring onions, sliced
Why You Must Try This Taco Dip Recipe
Taco dip works because every layer adds something different — the cream cheese base is rich and tangy from the taco seasoning, the refried beans add substance and depth, the cheese melts slightly into the warm beans, and the fresh toppings on top add crunch and brightness that keeps the whole thing from feeling heavy.
Unlike warm dips that need to stay hot to taste good, taco dip is served cold so you can make it hours ahead and it only gets better as the base firms up and the seasoning infuses. It’s a dip that looks like it took effort and genuinely requires almost none.
Make the Seasoned Base
Start with room temperature cream cheese — cold cream cheese will leave lumps in the base no matter how long you stir it. Beat the softened cream cheese and sour cream together until completely smooth.
Add the full packet of taco seasoning and the garlic powder and mix until evenly incorporated. The base should be uniform in color — a light orange-tan from the seasoning — with no white streaks. Taste it at this stage. It should taste well-seasoned and slightly tangy.
Taco seasoning packets vary in salt level between brands, so if it tastes too salty, add an extra spoonful of plain sour cream to dilute it slightly.
Spread Into the Dish
Use a wide, shallow dish for this dip — a 9×13 inch baking dish or a large round pie dish both work well. The surface area matters because taco dip is a layered dip that people eat by scooping straight down through the layers.
A deep bowl means the chips can’t reach the bottom layers without breaking. Spread the cream cheese base evenly across the bottom of the dish in an even layer, going all the way to the edges.
Use an offset spatula or the back of a spoon and take your time — an uneven base means the beans sit unevenly and the whole dip tilts.
Add the Bean Layer
Warm the refried beans slightly in the microwave for about a minute — just enough to make them spreadable. Cold refried beans straight from the can are stiff and difficult to spread without pulling up the cream cheese layer underneath.
Spoon the warmed beans over the cream cheese base and spread gently and evenly. Don’t press too hard or you’ll push through to the layer below. The beans should cover the cream cheese completely.
Let the bean layer cool for a few minutes before adding the cheese on top, so the cheese doesn’t melt into the beans and disappear into the layers.
Build the Remaining Layers
Scatter the shredded cheese evenly over the cooled bean layer. At this point the dip can go into the fridge if you’re making it ahead — cover it and refrigerate until close to serving time, then add the fresh toppings.
When you’re ready to finish, add the shredded lettuce, diced tomatoes, diced green pepper, sliced black olives, and spring onions in that order.
Seed the tomatoes before dicing — tomatoes with seeds release liquid that makes the top layer wet within an hour. Dice the green pepper small so it’s easy to scoop with a chip. Each topping should be spread evenly to the edges so every scoop gets a bit of everything.
Chill and Serve
If you’ve assembled the full dip, cover it and refrigerate for at least 30 minutes before serving — an hour is better. The base firms up and the layers settle, making the dip easier to scoop through without everything sliding. Serve cold directly from the dish with tortilla chips or Fritos scoops.
A wide, flat chip is better for this dip than a narrow one — you want to scoop through all the layers in a single motion. Set out two or three bags of chips so people aren’t reaching over each other at a crowded table.
How To Make This Taco Dip Recipe Better
These additions upgrade the base recipe without overcomplicating it:
- Add a guacamole layer. Spread a thin layer of guacamole between the cream cheese base and the refried beans. It adds creaminess and a mild avocado flavor that works well against the spiced base and the beans. Make it the day of — guacamole browns quickly.
- Add a sour cream layer on top of the beans. A separate thin layer of plain sour cream between the beans and the cheese adds an extra creamy element and keeps the cheese layer from sticking directly to the warm beans.
- Use pepper jack instead of cheddar. Pepper jack melts into the beans slightly differently and adds a slow background heat that works well if you’re serving the dip at a crowd that likes a little spice.
- Add pickled jalapeños to the top layer. A small handful of pickled jalapeño slices scattered over the finished dip adds heat and a tangy note that cuts through the richness of the cream cheese and beans.
Storage
Taco dip with the fresh toppings on keeps in the fridge for up to 2 days, though the lettuce wilts and the tomatoes release moisture as it sits. For the best result over multiple days, store the base with beans and cheese assembled and covered, and add the fresh toppings fresh each time you serve it.
The base layers keep well for up to 3 days in the fridge. Don’t freeze taco dip — the dairy base separates when thawed and the texture of the vegetables after freezing is poor. Leftovers are worth eating the next day even with softened lettuce — the flavors have melded together further and the base tastes better.
Can You Make Taco Dip the Night Before?
Yes, and it’s the recommended approach for the best flavor. The cream cheese base firms up overnight and the taco seasoning fully infuses through the dairy layers, making the base taste more cohesive and less like seasoning stirred into cream cheese. Assemble the base, bean, and cheese layers the night before and cover tightly with plastic wrap. Refrigerate overnight.
Add the fresh toppings — lettuce, tomatoes, green pepper, olives, and spring onions — within an hour of serving so they stay fresh. The assembled base layers can sit in the fridge for up to 24 hours before the fresh toppings go on without any loss in quality.
What’s the Difference Between Taco Dip and 7 Layer Dip?
They’re similar but not the same. Seven layer dip has a defined structure — refried beans, guacamole, sour cream, salsa, cheese, tomatoes, and black olives, in that order, with seven distinct layers.
Taco dip uses a seasoned cream cheese and sour cream base as its foundation rather than plain sour cream, skips the guacamole and salsa layers, and adds toppings like lettuce and green pepper that aren’t part of a traditional 7 layer. Taco dip also leans more on the cream cheese base as a defining element, whereas 7 layer dip is more about the individual layers being distinct and visible from the side of the dish.
Both are cold layered dips served with chips, but the flavor profiles are different — taco dip tastes of taco seasoning throughout every scoop, while 7 layer dip tastes more of its individual components.
Taco dip is one of those party staples that never needs explaining or convincing. Put it on the table with a bag of tortilla chips and it handles itself. Make it the night before, add the fresh toppings an hour before serving, and you’re done.

Ingredients
Method
- Beat softened cream cheese and sour cream together until completely smooth. Add taco seasoning and garlic powder and mix until fully combined and uniform in color. Taste and adjust — add a little more sour cream if it tastes too salty.
- Spread the base evenly across the bottom of a wide shallow dish (9×13 inch or large round pie dish) going all the way to the edges. Use an offset spatula or back of a spoon for an even layer.
- Warm refried beans in the microwave for 1 minute until spreadable. Spoon over the cream cheese base and spread gently and evenly. Let cool a few minutes before adding cheese.
- Scatter shredded cheese evenly over the cooled bean layer. At this point the dip can be covered and refrigerated overnight if making ahead.
- Within 1 hour of serving, add shredded lettuce, seeded diced tomatoes, diced green pepper, sliced black olives, and spring onions in that order. Spread each topping evenly to the edges.
- Refrigerate for at least 30 minutes before serving. Serve cold directly from the dish with tortilla chips or Fritos scoops.
Notes
- Use a wide shallow dish — deep bowls make it hard to scoop through all the layers
- Seed the tomatoes before dicing to prevent excess liquid on the top layer
- Soften cream cheese fully before mixing — cold cream cheese causes lumps
- Make ahead: assemble base, bean, and cheese layers the night before — add fresh toppings within 1 hour of serving
- Season the refried beans with cumin, garlic powder, and hot sauce before spreading for better flavor
- Does not freeze — dairy base separates when thawed
- Keeps up to 2 days — store base layers separately from fresh toppings for best results