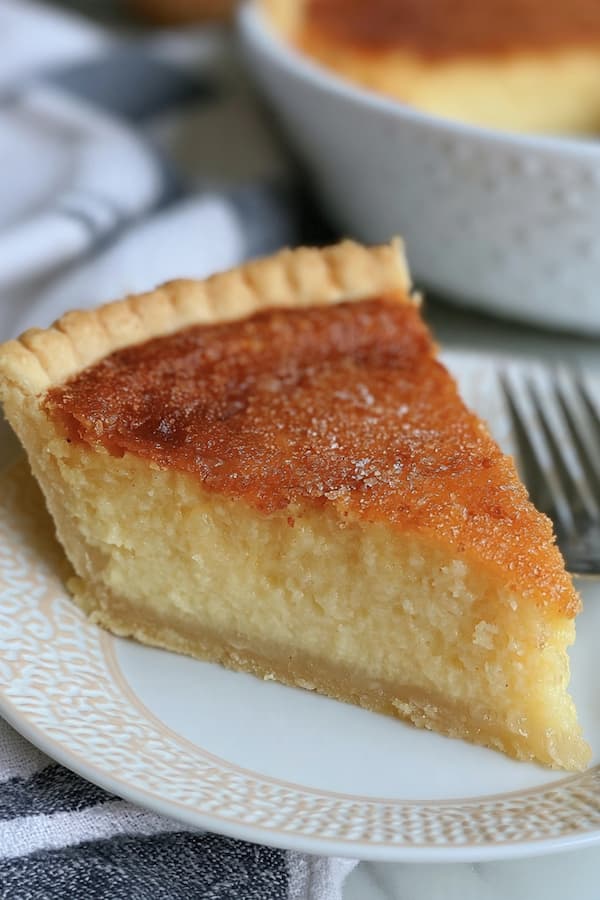
Buttermilk pie bakes down into something between a custard and a very light cheesecake, held together by eggs and thickened just enough with flour to set without turning dense.
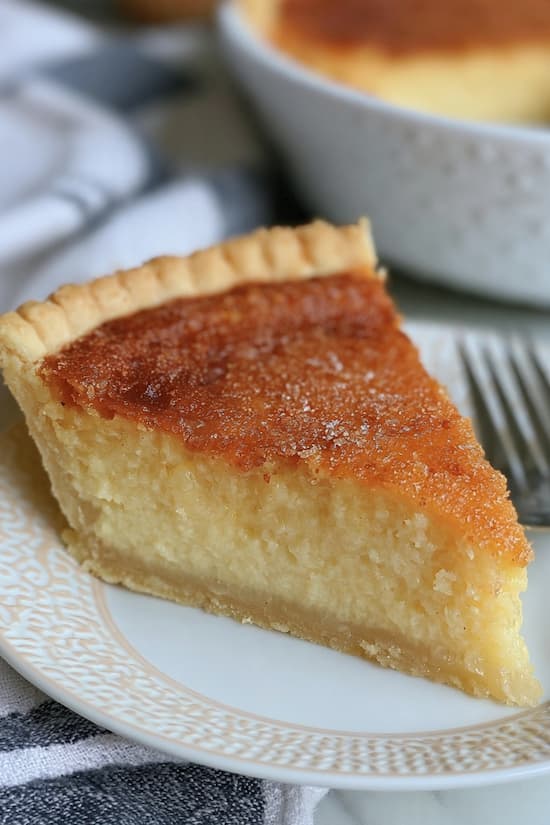
The tang from the buttermilk keeps the whole thing from tasting purely sweet, cutting through the sugar the same way a squeeze of lemon might, while the top bakes to a deep amber color that’s almost caramelized by the time the center is fully set.
It’s a simple pie in terms of ingredients, mostly pantry staples plus a bottle of buttermilk, but the payoff in texture and flavor is well beyond what the short ingredient list suggests.
Ingredients
- 1 unbaked 9-inch pie crust
- 1 1/2 cups sugar
- 1/3 cup all-purpose flour
- 1/2 cup unsalted butter, melted
- 3 large eggs
- 1 cup buttermilk
- 1 teaspoon vanilla extract
- 1/4 teaspoon salt
Why You’ll Love This Buttermilk Pie
- The filling comes together in one bowl with a whisk, no mixer or special equipment required.
- Buttermilk’s tang keeps the pie from tasting flatly sweet, giving it more depth than a standard sugar pie.
- It uses ingredients most kitchens already have on hand, aside from the buttermilk itself.
- The pie bakes up with a naturally golden, slightly crackled top with no separate glaze or topping needed.
- It’s a make ahead friendly dessert, since it needs to chill before serving anyway.
Ingredient Notes
Buttermilk brings both the tang and some of the structure to this pie, so it isn’t a good candidate for substituting with regular milk. If buttermilk isn’t available, stirring a tablespoon of lemon juice or vinegar into a cup of regular milk and letting it sit for five minutes makes a reasonable stand in.
Melted butter needs to cool slightly before it’s whisked into the eggs, since butter that’s too hot can start to scramble them on contact. A minute or two of cooling on the counter is usually enough.
All-purpose flour is what gives this pie its custard-like set without needing a separate thickener like cornstarch. Measuring it properly, spooning it into the measuring cup rather than scooping directly from the bag, keeps the amount from running high and the filling from turning too dense.
A standard unbaked pie crust works fine here, whether homemade or store bought. Since the filling bakes for close to an hour, there’s no need to pre-bake or blind bake the crust first, as the extended bake time is enough to fully cook the bottom.
Vanilla extract is a small addition but rounds out the flavor against the buttermilk’s tang. Use a real vanilla extract rather than imitation if you have the choice, since the flavor comes through more clearly in a filling this simple.
How to Make Buttermilk Pie
Preheat the oven to 350°F and have the unbaked pie crust ready in its pan. Whisk together the sugar and flour in a large bowl until evenly combined, breaking up any small clumps of flour.
Add the melted butter to the sugar mixture and whisk until smooth. Add the eggs one at a time, whisking well after each addition, then whisk in the buttermilk, vanilla extract, and salt until the filling is fully combined and no streaks remain.
Pour the filling into the unbaked pie crust. If the crust edges are thin, consider covering them loosely with strips of foil to prevent over-browning during the long bake time.
Bake for 50 to 60 minutes, until the top is deep golden and the center is just set, with a slight jiggle remaining in the very middle. The pie will continue to firm up as it cools, so a small amount of movement in the center at this stage is expected rather than a sign it needs more time. Ovens vary, so start checking around the 50 minute mark rather than waiting for the full time to be sure.
Let the pie cool completely at room temperature, then refrigerate for at least 2 hours before slicing. This chilling time is what allows the custard to fully set into clean slices instead of spilling out when cut. Slicing with a thin, sharp knife wiped clean between cuts also helps keep the edges neat.
Tips for Success
- Let melted butter cool slightly before adding it to the eggs, so it doesn’t start cooking them.
- Measure the flour by spooning it into the measuring cup and leveling it off, rather than scooping directly from the bag.
- Watch the crust edges during the long bake time and tent with foil if they’re browning too quickly.
- Expect a slight jiggle in the center when the pie comes out of the oven. It firms up fully as it cools.
- Give the pie its full chilling time before slicing, since cutting it warm will make for messy, runny slices.
Storage
Store the pie covered in the fridge for up to 4 days, since the eggs and dairy in the filling mean it shouldn’t sit out at room temperature for long. This pie also freezes reasonably well. Wrap it tightly once fully chilled and freeze for up to 2 months, then thaw overnight in the fridge before serving.
FAQ
Why did my pie crack on top?
A crack usually means the pie baked slightly too long or at too high a temperature. It’s still fine to eat, and a light dusting of powdered sugar before serving can help disguise any surface cracks.
Can I use a store bought crust?
Yes. A store bought unbaked pie crust works fine and saves time, with no other changes needed to the recipe.
Is buttermilk pie the same as chess pie?
They’re closely related but not identical. Chess pie typically includes a bit of cornmeal for texture and doesn’t always include buttermilk, while this version leans on buttermilk specifically for its tang and part of its set.
Can I add lemon zest or nutmeg?
Yes. A teaspoon of lemon zest or a pinch of freshly grated nutmeg whisked into the filling are both traditional variations that add a bit more flavor without changing the method.
Ingredients
Method
- Preheat the oven to 350°F. Whisk together the sugar and flour in a large bowl.
- Whisk in the melted butter until smooth, then add the eggs one at a time, whisking well after each.
- Whisk in the buttermilk, vanilla, and salt until fully combined.
- Pour the filling into the unbaked pie crust. Tent the edges with foil if needed.
- Bake 50 to 60 minutes, until deep golden with a slight jiggle in the center.
- Cool completely, then refrigerate at least 2 hours before slicing.