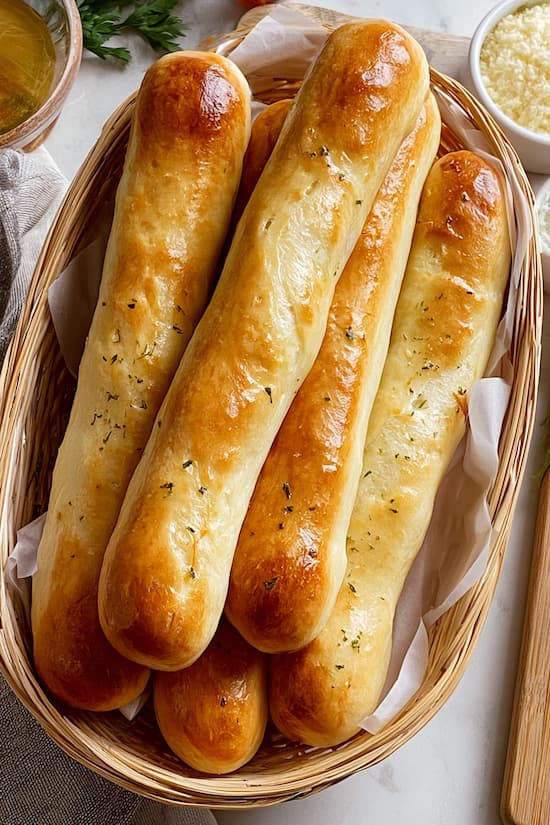
Olive Garden breadsticks are the thing people talk about as much as the pasta, and making them at home turns out to be more achievable than most people expect.
The dough is a basic yeast dough that comes together in one bowl, and the garlic butter that goes on top right out of the oven is what makes them taste like the restaurant version.
If you’ve been buying store-bought breadsticks out of habit, this recipe is the reason to stop.

Ingredients
Makes: 12 breadsticks (serves 4–6)
For the dough:
- 1 1/3 cups warm water (around 110°F)
- 2 1/4 teaspoons active dry yeast (1 packet)
- 2 tablespoons sugar, divided
- 3 1/2 cups bread flour, plus more for dusting
- 1 1/2 teaspoons salt
- 3 tablespoons unsalted butter, softened
- 1 tablespoon olive oil (for greasing the bowl)
For the garlic butter topping:
- 4 tablespoons unsalted butter, melted
- 1/2 teaspoon garlic powder
- 1/4 teaspoon salt
- 1/4 teaspoon dried parsley (or 1 teaspoon fresh, finely chopped)
Why You Must Try This Olive Garden Breadsticks Recipe
The Olive Garden breadstick is softer than most homemade bread and that’s exactly the point. The dough uses bread flour for a slight chew, a small amount of butter worked in for tenderness, and just enough sugar to help the yeast along and give the crust a faint golden color.
What finishes the whole thing is the garlic butter brushed on right out of the oven — it soaks into the warm bread immediately rather than sitting on top. You get something that’s soft all the way through, garlicky without being sharp, and worth making from scratch every single time.
Wake Up the Yeast
Add the warm water to a large bowl with one tablespoon of sugar and the yeast. Stir gently and leave it for 5 to 10 minutes.
You’re looking for the mixture to become foamy and slightly puffed on the surface — that tells you the yeast is alive and active. If nothing happens after 10 minutes, the water was either too hot, which kills the yeast, or too cold, which keeps it dormant.
The target is around 110°F — warm enough to feel hot on the inside of your wrist but not scalding. Start over with fresh yeast if the first batch doesn’t foam.
Build the Dough
Add the remaining tablespoon of sugar, the salt, and the softened butter to the yeast mixture. Add the bread flour one cup at a time, stirring between each addition until a shaggy dough forms.
Turn it out onto a lightly floured surface and knead for 8 to 10 minutes until the dough is smooth, slightly tacky, and springs back when you poke it. If you have a stand mixer with a dough hook, run it on medium speed for 6 to 7 minutes — it does the same job with less effort.
The dough should be soft but not sticky. If it sticks to your hands, add flour one tablespoon at a time.
Let It Rise
Shape the dough into a ball and place it in a lightly oiled bowl. Turn it once so the surface is coated in oil, then cover with plastic wrap or a clean kitchen towel. Leave it somewhere warm to rise for 1 to 1.5 hours until it has doubled in size.
A turned-off oven with just the light on works well. The rise time is what gives the breadsticks their texture — don’t rush it by placing the dough somewhere too warm.
If the dough rises too fast, it can develop large air pockets that make the finished breadstick uneven and slightly gummy in the center.
Shape the Breadsticks
Punch the dough down to release the air and turn it out onto a lightly floured surface. Divide it into 12 equal pieces — a kitchen scale makes this easier if you want them uniform. Roll each piece into a log about 8 inches long by applying even pressure with both hands and working from the center outward.
Place them on parchment-lined baking sheets with about 2 inches between each one. Cover loosely and let them rest for another 30 minutes. They won’t double in size this time, just puff slightly — that second rest is what gives them the soft, pillowy texture rather than dense and bready.
Bake and Butter
Preheat your oven to 400°F. Bake the breadsticks for 14 to 16 minutes until the tops are pale golden — they should look lightly colored, not dark brown. Olive Garden breadsticks are soft, not crusty, so pull them before they get too much color.
While they bake, mix the melted butter with garlic powder, salt, and parsley. The moment the breadsticks come out of the oven, brush the butter mixture over the tops generously.
Do it immediately — the heat from the bread pulls the butter in and the garlic flavor gets absorbed into the surface rather than sitting on top as a coating.
How To Make This Olive Garden Breadsticks Recipe Better
The base recipe is already close to the original, but these variations are worth trying:
Use real garlic instead of garlic powder. Finely grate or press one clove of garlic into the melted butter and let it sit for a few minutes before brushing. The flavor is more forward and slightly sharper than powdered garlic — some people prefer it, some don’t.
Brush before and after baking. Lightly brushing the shaped breadsticks with melted butter before they go into the oven helps them develop a slightly more golden surface. Then brush again with the garlic butter immediately when they come out.
Add a pinch of Italian seasoning to the butter. Just 1/4 teaspoon mixed into the garlic butter gives the topping a little herby character without changing what the breadstick fundamentally is.
Sprinkle parmesan over the top right after buttering. A fine grating of parmesan applied while the butter is still hot will stick to the surface and create a faint savory crust as it cools. It’s a small addition that makes the breadsticks more substantial.
Make them cheesy. After the second rise, press a strip of shredded mozzarella into the center of each log before baking. The cheese melts inside as they bake and you get a pull of cheese in the middle when you break one open.
Storage
Store leftover breadsticks in an airtight bag or container at room temperature for up to 2 days. To reheat, wrap them in foil and warm in a 350°F oven for 8 to 10 minutes. The foil keeps them from drying out and the heat brings the softness back.
You can also microwave them for 20 to 30 seconds wrapped in a damp paper towel, but the texture won’t be as good. For longer storage, freeze the baked and cooled breadsticks in a zip-lock bag for up to 2 months. Reheat from frozen in a 350°F oven for 12 to 15 minutes, still wrapped in foil.
Can You Make the Dough the Night Before?
Yes, and it actually improves the flavor. After the first knead, place the dough in an oiled bowl, cover it tightly with plastic wrap, and refrigerate overnight instead of letting it rise at room temperature.
Cold temperatures slow the yeast down so the dough rises slowly over 8 to 12 hours. This slower fermentation develops more flavor in the dough — the finished breadsticks will taste slightly more complex than the same-day version.
When you’re ready to bake, take the dough out of the fridge, let it sit at room temperature for 30 to 45 minutes, then shape, do the second rise, and bake as normal.
Why Are My Breadsticks Dense?
Dense breadsticks usually come from one of three things. The most common is yeast that didn’t activate properly — if the yeast didn’t foam during the first step, the dough won’t rise correctly no matter how long you leave it. Always check for foam before proceeding.
The second cause is not kneading the dough long enough. Under-kneaded dough doesn’t develop the gluten structure needed to trap the gas from the yeast, so the breadstick bakes up tight and heavy rather than light and airy. Eight to ten minutes of hand kneading is the minimum. The third cause is skipping or rushing the second rise after shaping — that rest period is what gives the breadstick its final lightness before it hits the oven.
Homemade Olive Garden breadsticks take more time than buying a bag at the store, but the difference in what you get at the end makes it worth the effort. Once you’ve made them once, the process becomes second nature and the results are consistent every time.
Ingredients
Method
- Combine warm water, 1 tablespoon sugar, and yeast in a large bowl. Stir gently and leave for 5–10 minutes until foamy. If no foam forms, start over with fresh yeast.
- Add remaining sugar, salt, and softened butter to the yeast mixture. Add bread flour one cup at a time, stirring between additions. Turn dough onto a lightly floured surface and knead for 8–10 minutes until smooth and slightly tacky. Alternatively, use a stand mixer with a dough hook on medium for 6–7 minutes.
- Place dough in a lightly oiled bowl, turn once to coat, and cover with plastic wrap. Leave in a warm spot for 1 to 1.5 hours until doubled in size.
- Punch dough down and divide into 12 equal pieces. Roll each into a log about 8 inches long. Place on parchment-lined baking sheets 2 inches apart. Cover loosely and rest for 30 minutes until slightly puffed.
- Preheat oven to 400°F. Bake for 14–16 minutes until pale golden on top. Do not overbake — breadsticks should stay soft, not turn dark or crusty.
- Mix melted butter with garlic powder, salt, and parsley. Brush generously over breadsticks immediately as they come out of the oven. Serve warm.
Notes
- Water temperature is key — too hot kills the yeast, too cold keeps it dormant. Aim for 110°F
- Brush butter on immediately out of the oven so it absorbs into the warm bread
- Make-ahead option: refrigerate dough overnight after first knead for better flavor
- Freeze baked breadsticks for up to 2 months — reheat from frozen at 350°F for 12–15 minutes wrapped in foil
- Add a fine grating of parmesan over the garlic butter topping for extra flavor