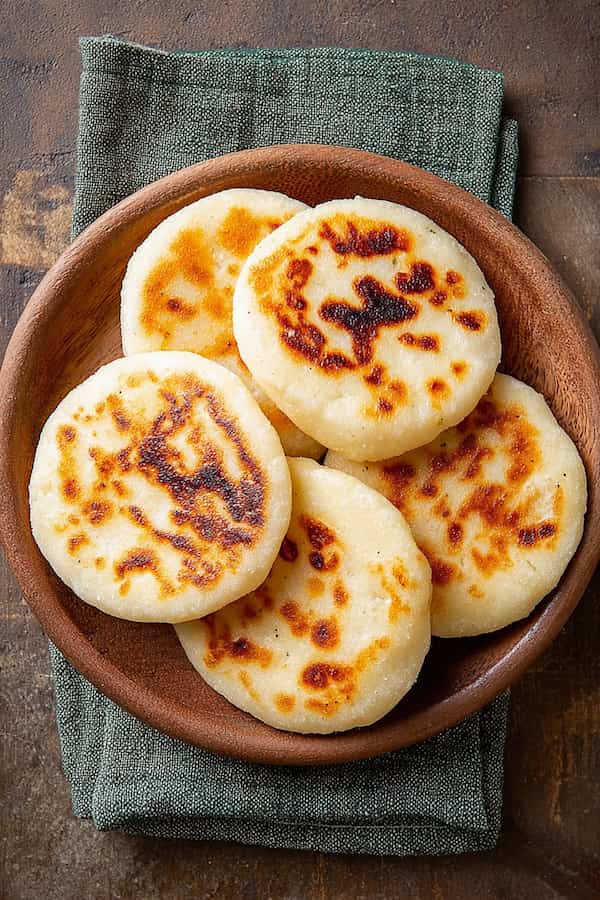
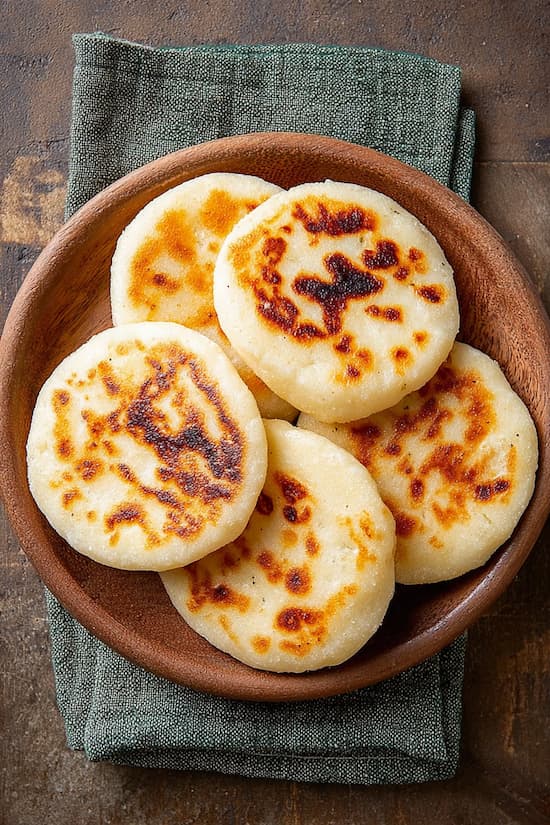
Arepas are thick cornmeal patties from Venezuela and Colombia — made from pre-cooked white cornmeal, water, and salt — that get pan-fried or griddled until the outside forms a golden crust while the inside stays soft and almost pillowy.
They’re naturally gluten-free, take about 20 minutes from mixing to table, and work equally well as a side, a breakfast, or a vessel for fillings split open down the middle. Once you’ve made them, plain bread starts to feel like an afterthought.
Ingredients
Makes: 6 arepas (serves 3–6)
For the arepas:
- 2 cups pre-cooked white cornmeal (masarepa — see notes)
- 2 cups warm water
- 1 teaspoon salt
- 1 tablespoon butter or neutral oil (optional, for richer flavor)
- Oil or butter for cooking
Filling ideas (pick any):
- Shredded mozzarella or queso blanco
- Black beans and avocado
- Refried beans and cheese
- Scrambled eggs
- Butter and salt
- Shredded chicken with avocado and salsa
Why You Must Try This Arepas Recipe
Arepas fill a gap in most people’s bread repertoire — something that’s quick to make from scratch, gluten-free, versatile enough for breakfast or dinner, and satisfying in a way that’s different from anything flour-based. The dough has three ingredients. The cooking happens in a pan in under 15 minutes.
The outside crust develops on its own from the pan heat. And the inside stays soft and slightly doughy in a way that makes every arepa feel substantial without being heavy. They don’t require yeast, a long rest, or any special technique — just the right cornmeal, the right amount of water, and a hot pan.
Use the Right Cornmeal
This is the most important thing to get right before you start. Arepas require pre-cooked white cornmeal, sold under the brand name Masarepa or P.A.N. — the white corn variety is the one you want for this recipe. It’s not the same as regular cornmeal, polenta, masa harina, or grits.
Regular cornmeal is raw and will not produce the right texture no matter how long you cook it. Pre-cooked cornmeal has been cooked and dried, which means it rehydrates quickly and holds together in a dough rather than staying grainy.
Look for it at Latin grocery stores, the international aisle of large supermarkets, or online. It’s inexpensive and keeps for months in a sealed container, so buying it once solves the ingredient question for a long time.
Mix the Dough
Combine the masarepa, salt, and butter or oil if using in a large bowl. Add the warm water gradually, stirring as you go. Once all the water is in, use your hands to bring the dough together.
Knead it briefly — about a minute — until it’s smooth and holds together without cracking at the edges. The dough should feel like firm playdough. If it cracks when you press it, add water a tablespoon at a time.
If it sticks to your hands, let it rest for two minutes — the cornmeal continues to absorb water as it sits and the dough will firm up slightly. Let the dough rest for 5 minutes after mixing before shaping.
Shape the Arepas
Divide the dough into 6 equal portions. Roll each piece into a smooth ball between your palms, then flatten it gently into a disc about 3/4 of an inch thick and 3.5 to 4 inches in diameter.
The thickness matters — too thin and the inside won’t be soft and pillowy, too thick and the outside will brown before the center cooks through. Press the edges gently to smooth any cracks — cracks on the edge mean the dough is slightly dry, which can cause the arepa to split during cooking.
If the edges crack consistently, wet your hands lightly with water before shaping the remaining pieces.
Cook on the Stovetop
Heat a large non-stick skillet or cast iron griddle over medium heat. Add a small amount of oil or butter and spread it evenly. Place the arepas in the pan with space between each one.
Cook for 5 to 6 minutes on the first side without moving them — you’re waiting for a golden-brown crust to develop and the arepa to release cleanly from the surface. Flip and cook for another 5 to 6 minutes on the second side. The outside should be golden and slightly firm in patches.
Tap the top of an arepa with your knuckle — a hollow sound means it’s cooked through. If it sounds dense, give it another minute or two.
Split and Fill
Let the arepas rest for 2 minutes after cooking before splitting. Use a sharp knife to cut around the edge like you’re opening a pita, leaving one side attached as a hinge. Open the arepa and add your filling directly to the inside.
The inside is soft and slightly doughy — it absorbs anything warm and melty extremely well. Butter alone is one of the best things you can put inside a fresh arepa. Shredded mozzarella that melts from the heat of the arepa is another.
Black beans and avocado, scrambled eggs, or refried beans with cheese are all good starting points. Serve while still warm.
How To Make This Arepas Recipe Better
These changes improve the base recipe or expand what you can do with it:
Add cheese to the dough. Mix 1/2 cup of shredded mozzarella or queso blanco into the dough before shaping. The cheese melts into the arepa as it cooks and the inside becomes even softer and more flavorful. This version is called arepa de choclo when made with sweet corn, but any cheese added to the basic masarepa dough is a worthwhile upgrade.
Finish in the oven. After pan-frying for 4 minutes per side, transfer the arepas to a 375°F oven for 8 to 10 minutes. This method guarantees the center cooks through without overbrowning the outside — useful if your arepas are on the thicker side.
Cook on a grill. Arepas cooked over charcoal develop a slight smokiness and a more charred crust. Brush with oil and cook over medium-high heat for 5 minutes per side. The grill marks and smoky flavor work particularly well if you’re filling them with something savory.
Make smaller arepas as a side. Shape the dough into smaller discs about 2 inches in diameter. They cook faster — 3 to 4 minutes per side — and work as a side dish alongside soups or stews instead of bread.
Top rather than fill. Instead of splitting and filling, serve the arepas flat and topped with refried beans, sliced avocado, a fried egg, or salsa. This approach is faster and works well for breakfast when you want something simple.
Storage
Store cooked arepas in an airtight container in the fridge for up to 4 days. Reheat in a dry pan over medium heat for 2 to 3 minutes per side to restore the crust — the microwave makes them soft all the way through, which changes the texture.
They also freeze well — freeze individually on a tray, then transfer to a bag for up to 2 months. Reheat from frozen in a 350°F oven for 15 minutes or in a pan over medium-low heat with a lid on for 5 to 6 minutes. Uncooked shaped arepas can be refrigerated on a tray for up to 24 hours before cooking.
What Is Masarepa and Is It the Same as Masa Harina?
Masarepa and masa harina are both made from corn but they are not interchangeable and produce completely different results. Masarepa — sold under brands like P.A.N. — is made from white or yellow corn that has been cooked, dried, and ground into a fine flour.
It rehydrates quickly and produces a smooth, pliable dough that holds together well. Masa harina is made from nixtamalized corn — corn that has been treated with an alkaline solution of lime — and is used primarily for tortillas, tamales, and Mexican-style preparations.
Masa harina produces a slightly different texture and flavor and does not behave the same way as masarepa in an arepa dough. Substituting masa harina for masarepa gives you a different product that won’t have the same soft interior or golden crust.
For authentic arepas, masarepa is the ingredient to find.
What Is the Difference Between Venezuelan and Colombian Arepas?
Both countries claim arepas as their own and both are right — the arepa predates either nation and has been a staple across the region for centuries. The main difference is in how they’re used. Venezuelan arepas are typically thicker and almost always split open and filled — they function more like a sandwich.
Colombian arepas tend to be thinner and served flat, often topped rather than filled, and sometimes made sweeter or with cheese mixed directly into the dough. Regional variations within each country add further complexity — coastal Colombian arepas are often grilled and seasoned differently from those made inland.
This recipe produces a Venezuelan-style arepa — thick, soft inside, golden outside, and designed to be split and filled — which is the version most people encounter first and the one most commonly searched.
Arepas are one of those recipes where knowing the right ingredient makes everything else easy. Get the masarepa, mix the dough, cook them hot, and fill them while they’re warm. Once you’ve made them once, the process takes less than 20 minutes and becomes something you do without thinking.
Ingredients
Method
- Combine masarepa and salt in a large bowl. Add butter or oil if using. Add warm water gradually, stirring as you go. Use your hands to knead briefly until smooth — about 1 minute. Dough should feel like firm playdough. If it cracks, add water 1 tablespoon at a time. Rest 5 minutes.
- Divide dough into 6 equal portions. Roll each into a ball and flatten into a disc about 3/4 inch thick and 3.5–4 inches wide. Smooth any cracks at the edges by wetting your hands lightly.
- Heat a non-stick skillet or cast iron griddle over medium heat with a small amount of oil or butter. Add arepas with space between each. Cook 5–6 minutes on the first side without moving until golden brown. Flip and cook another 5–6 minutes. Tap the top — a hollow sound means cooked through.
- Let rest 2 minutes. Use a sharp knife to cut around the edge, leaving one side as a hinge, and open like a pita. Fill with your chosen fillings and serve warm.
Notes
- Use pre-cooked white cornmeal (masarepa or P.A.N.) only — regular cornmeal, masa harina, or polenta will not work
- Dough should feel like firm playdough — not sticky, not cracking
- Smooth edge cracks with slightly wet hands before cooking
- Tap to test doneness — a hollow sound means cooked through
- Oven-finish method: pan-fry 4 minutes per side then bake at 375°F for 8–10 minutes
- Add 1/2 cup shredded mozzarella to the dough before shaping for a cheesy version
- Store cooked arepas in the fridge for up to 4 days — reheat in a dry pan for best texture
- Freeze for up to 2 months — reheat from frozen at 350°F for 15 minutes